A Context Pod is the most flexible way to teach Figr about your product. Where a Design Language defines how things look, a Context Pod captures what your product is and how it behaves: flows, terminology, user needs, and constraints. Build it once, attach it to any project, and reference it as a chip on any prompt.

Create a Context Pod

1

Open Context Pod

From the sidebar, under Product intelligence.
2

Create a new pod

Click Create new Context Pod (top right). Give it a name (required) and an optional description.
3

Continue to setup

This opens the Add your product details screen, where you connect your sources.

Add your sources

A Context Pod accepts five source types. Use as many as you like; the more you add, the deeper Figr’s understanding. The richest source. Show Figr your product in motion.
  • Record a walkthrough directly, with optional microphone narration and full-screen capture
  • Or drag and drop an existing screen recording
A recorded flow tells Figr how screens connect and how users move through them, context a static screenshot cannot carry.

Upload files

Drag and drop supporting material: PDFs and design specs, screenshots and images, documents, and other product files.

Paste text

Open the note editor, give it a title, and write in the rich-text area. Useful for product overviews, terminology, or notes that do not live in a file. Paste a URL, like your product or marketing site. Figr validates the link and fetches the page so it can read your live content.

Add instructions

Free-form guidance that shapes how the agent responds:
When your sources are in, click Start Building to save the pod.

The pod summary

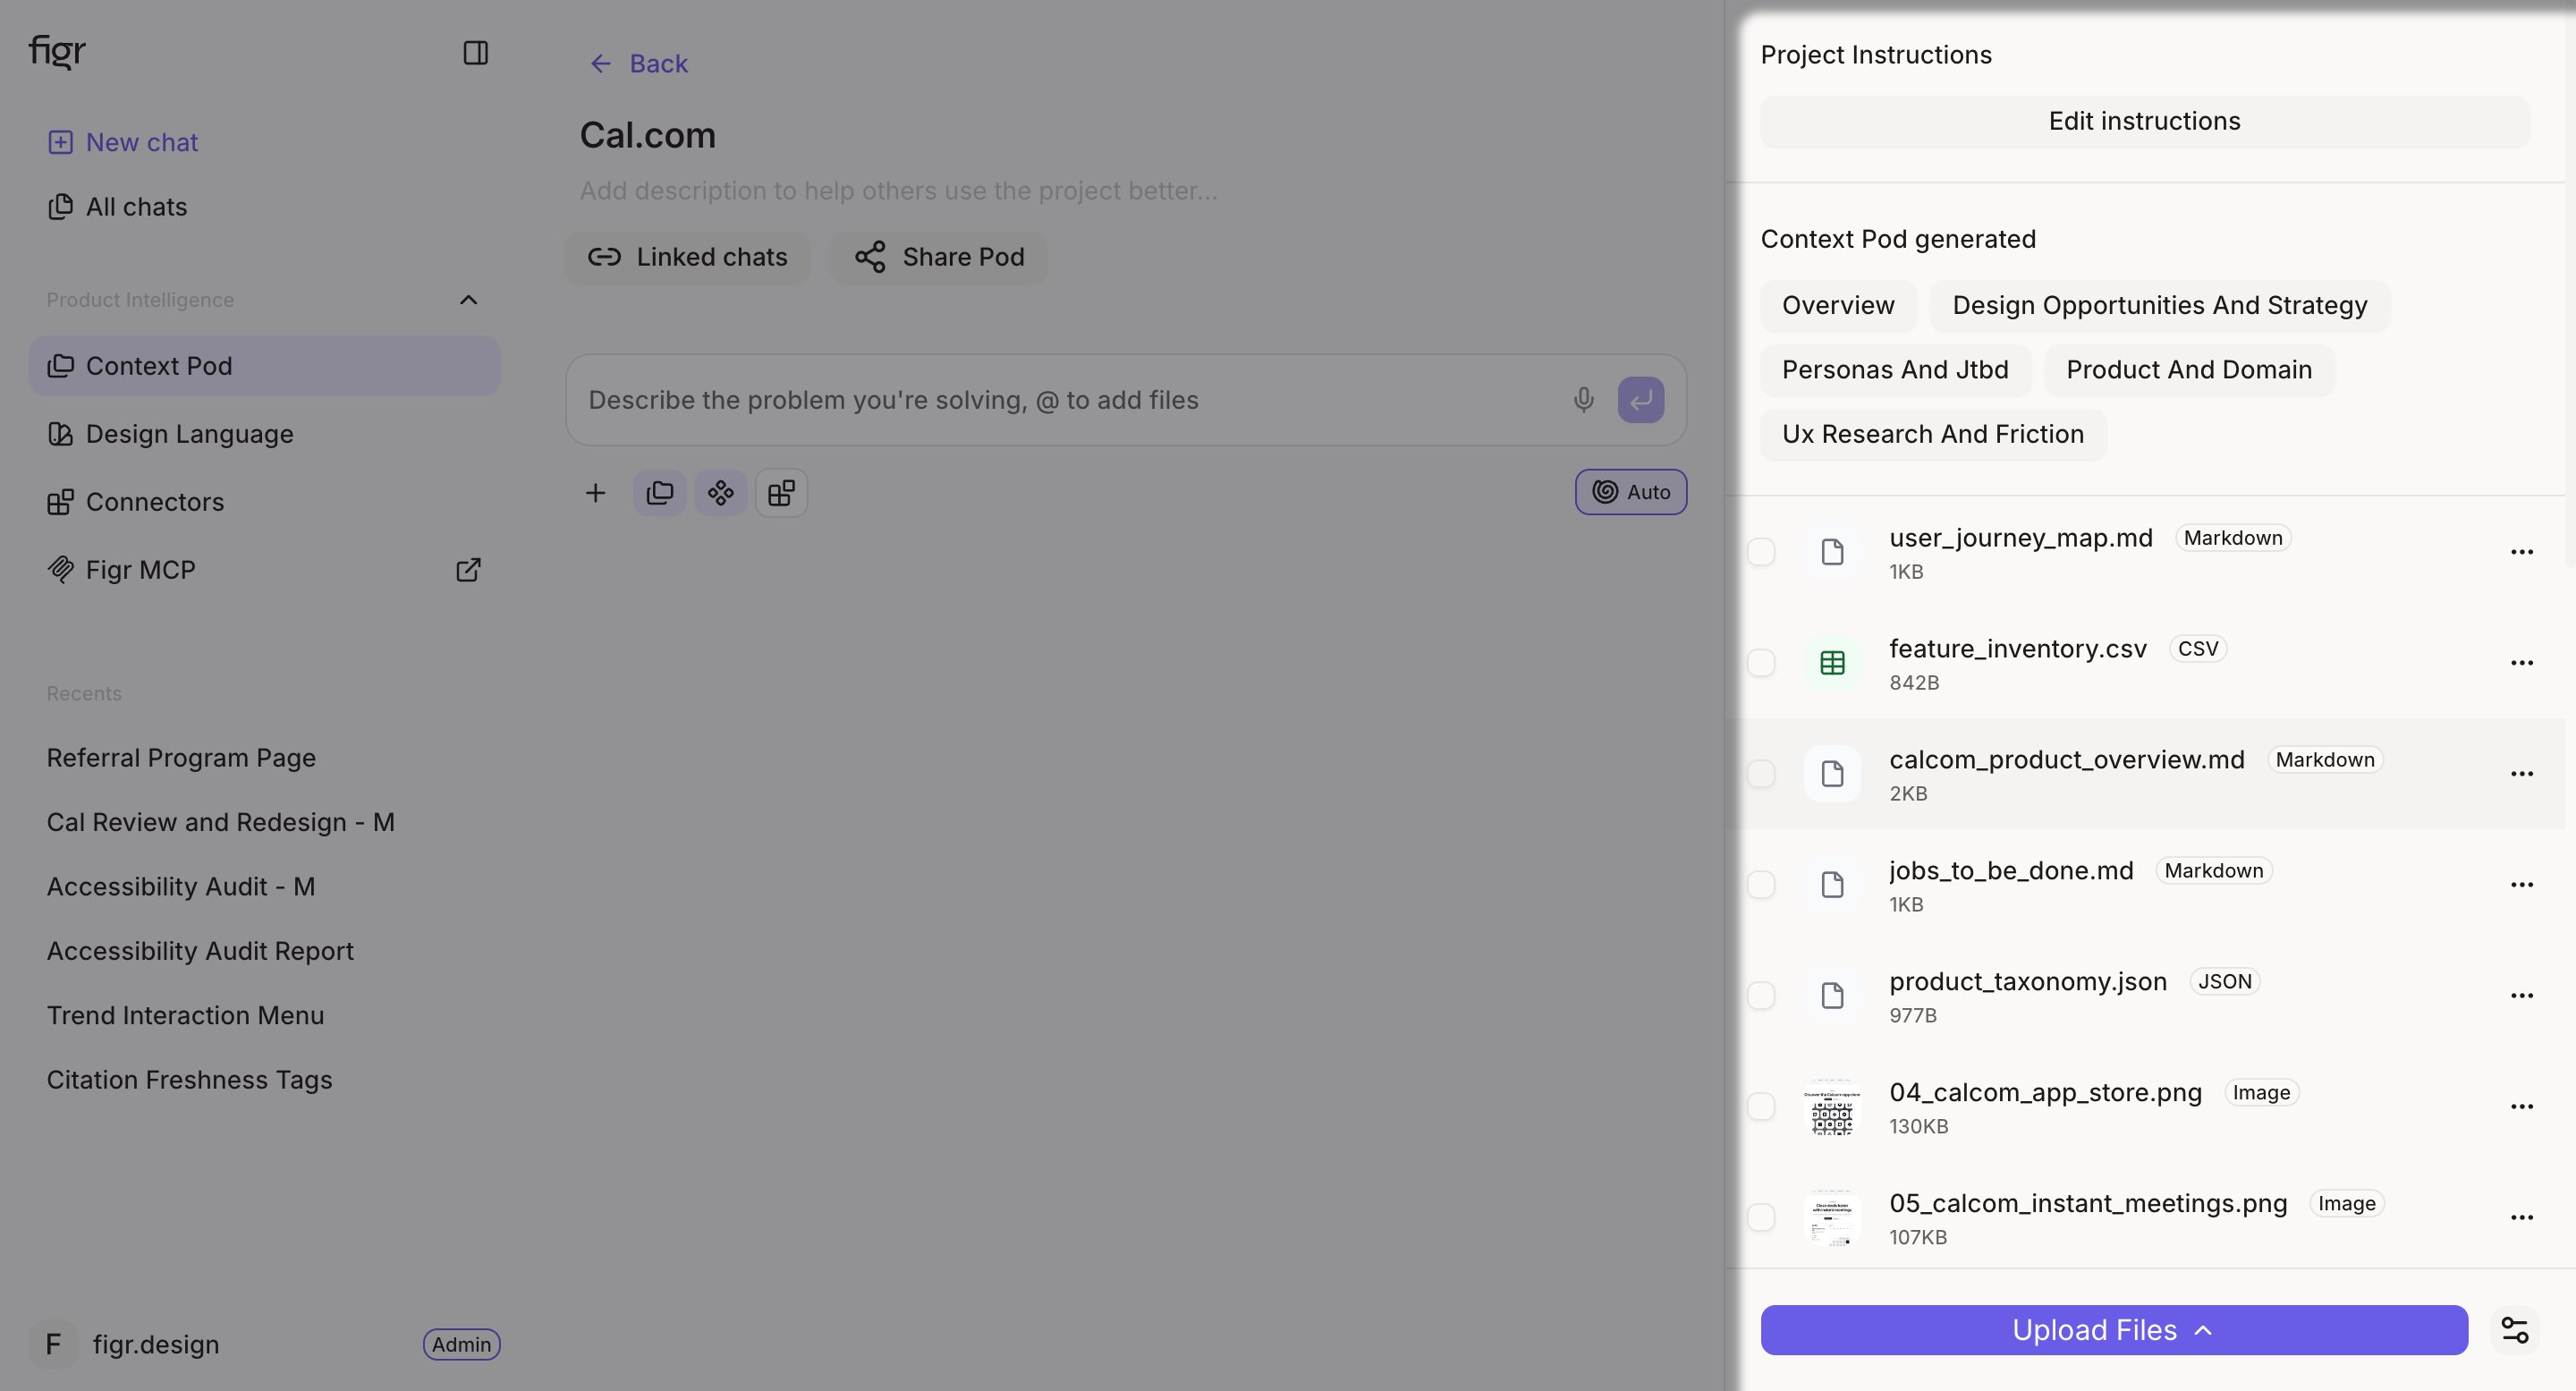
After building, you land on the pod’s summary dashboard. A right-side drawer lists everything linked to the pod, every recording, file, note, link, and instruction, alongside its generated context status. Return here anytime to review what the pod knows or to add and remove sources.
Context Pod summary dashboard listing linked sources

The Context Pod summary, with all linked sources in the right drawer.

Use a Context Pod

A Context Pod only shapes output once you attach it to a prompt.
1

Start a new chat

In a project, start a New chat on the canvas.
2

Open the attachment menu

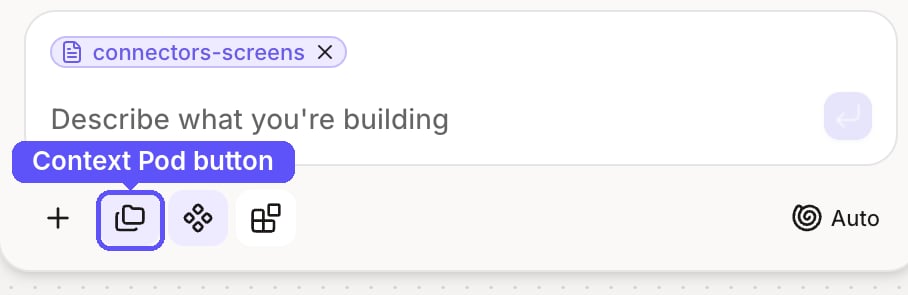
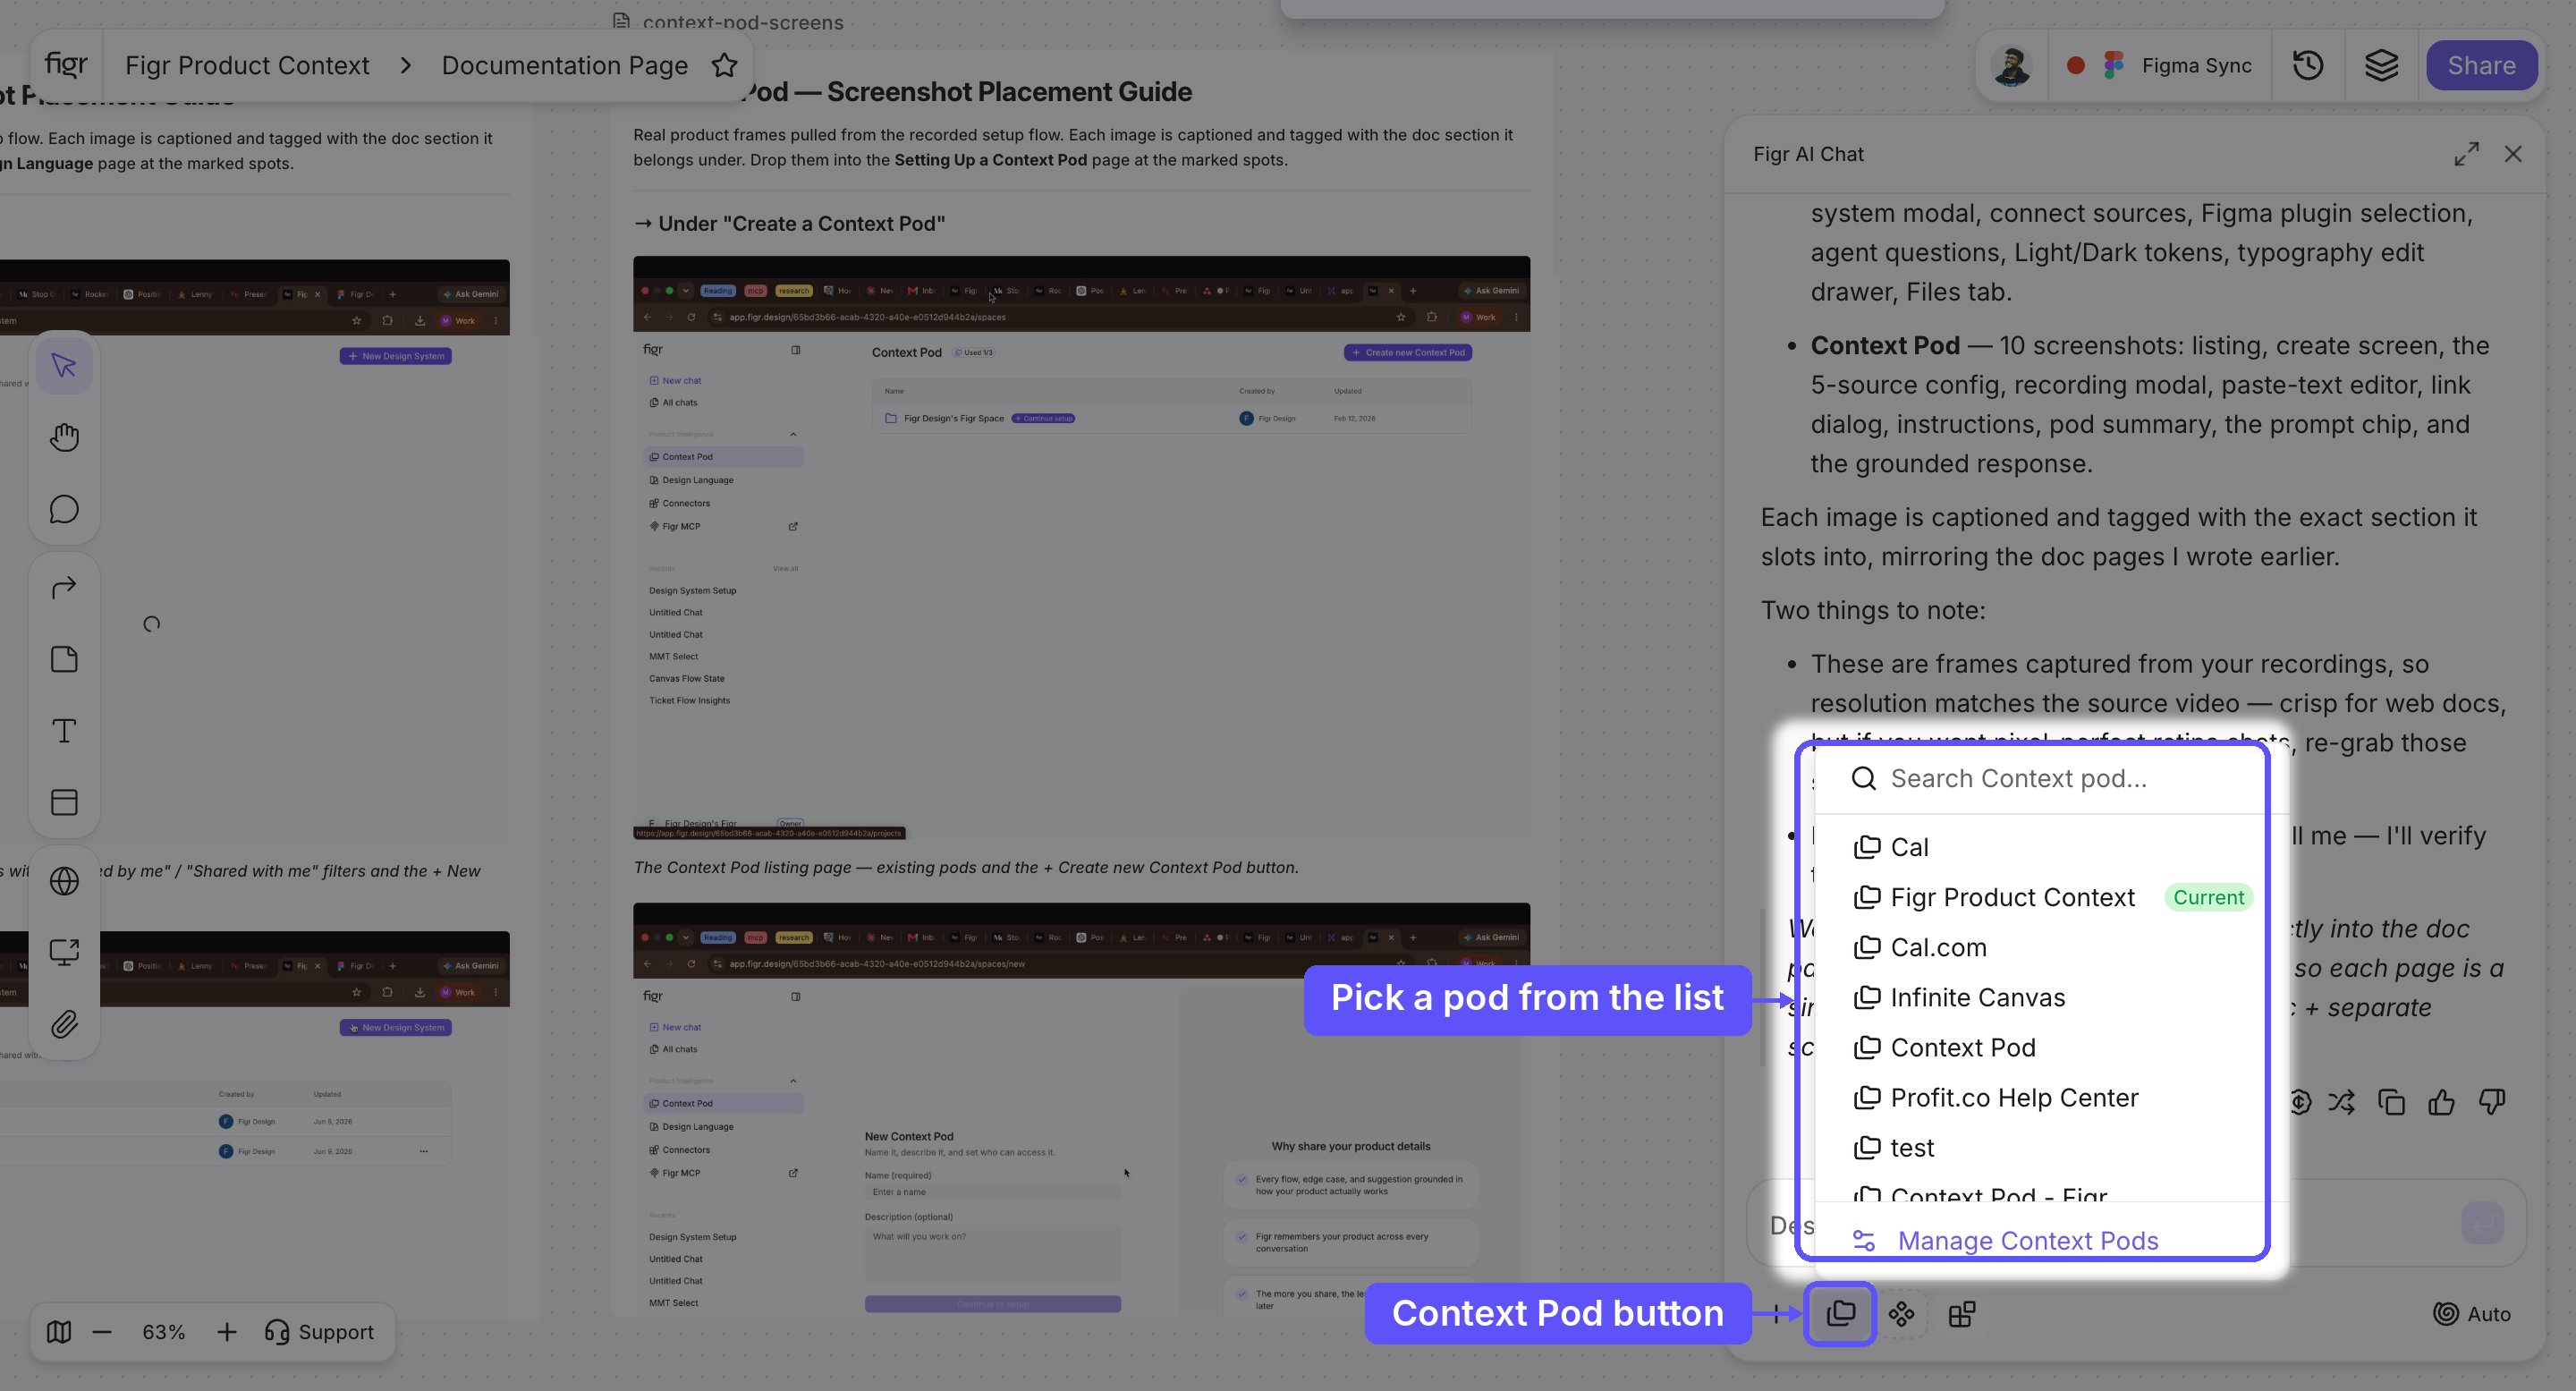
In the prompt box, open the attachment menu and select Context Pod.
Context Pod Menu

Context Pod Button

3

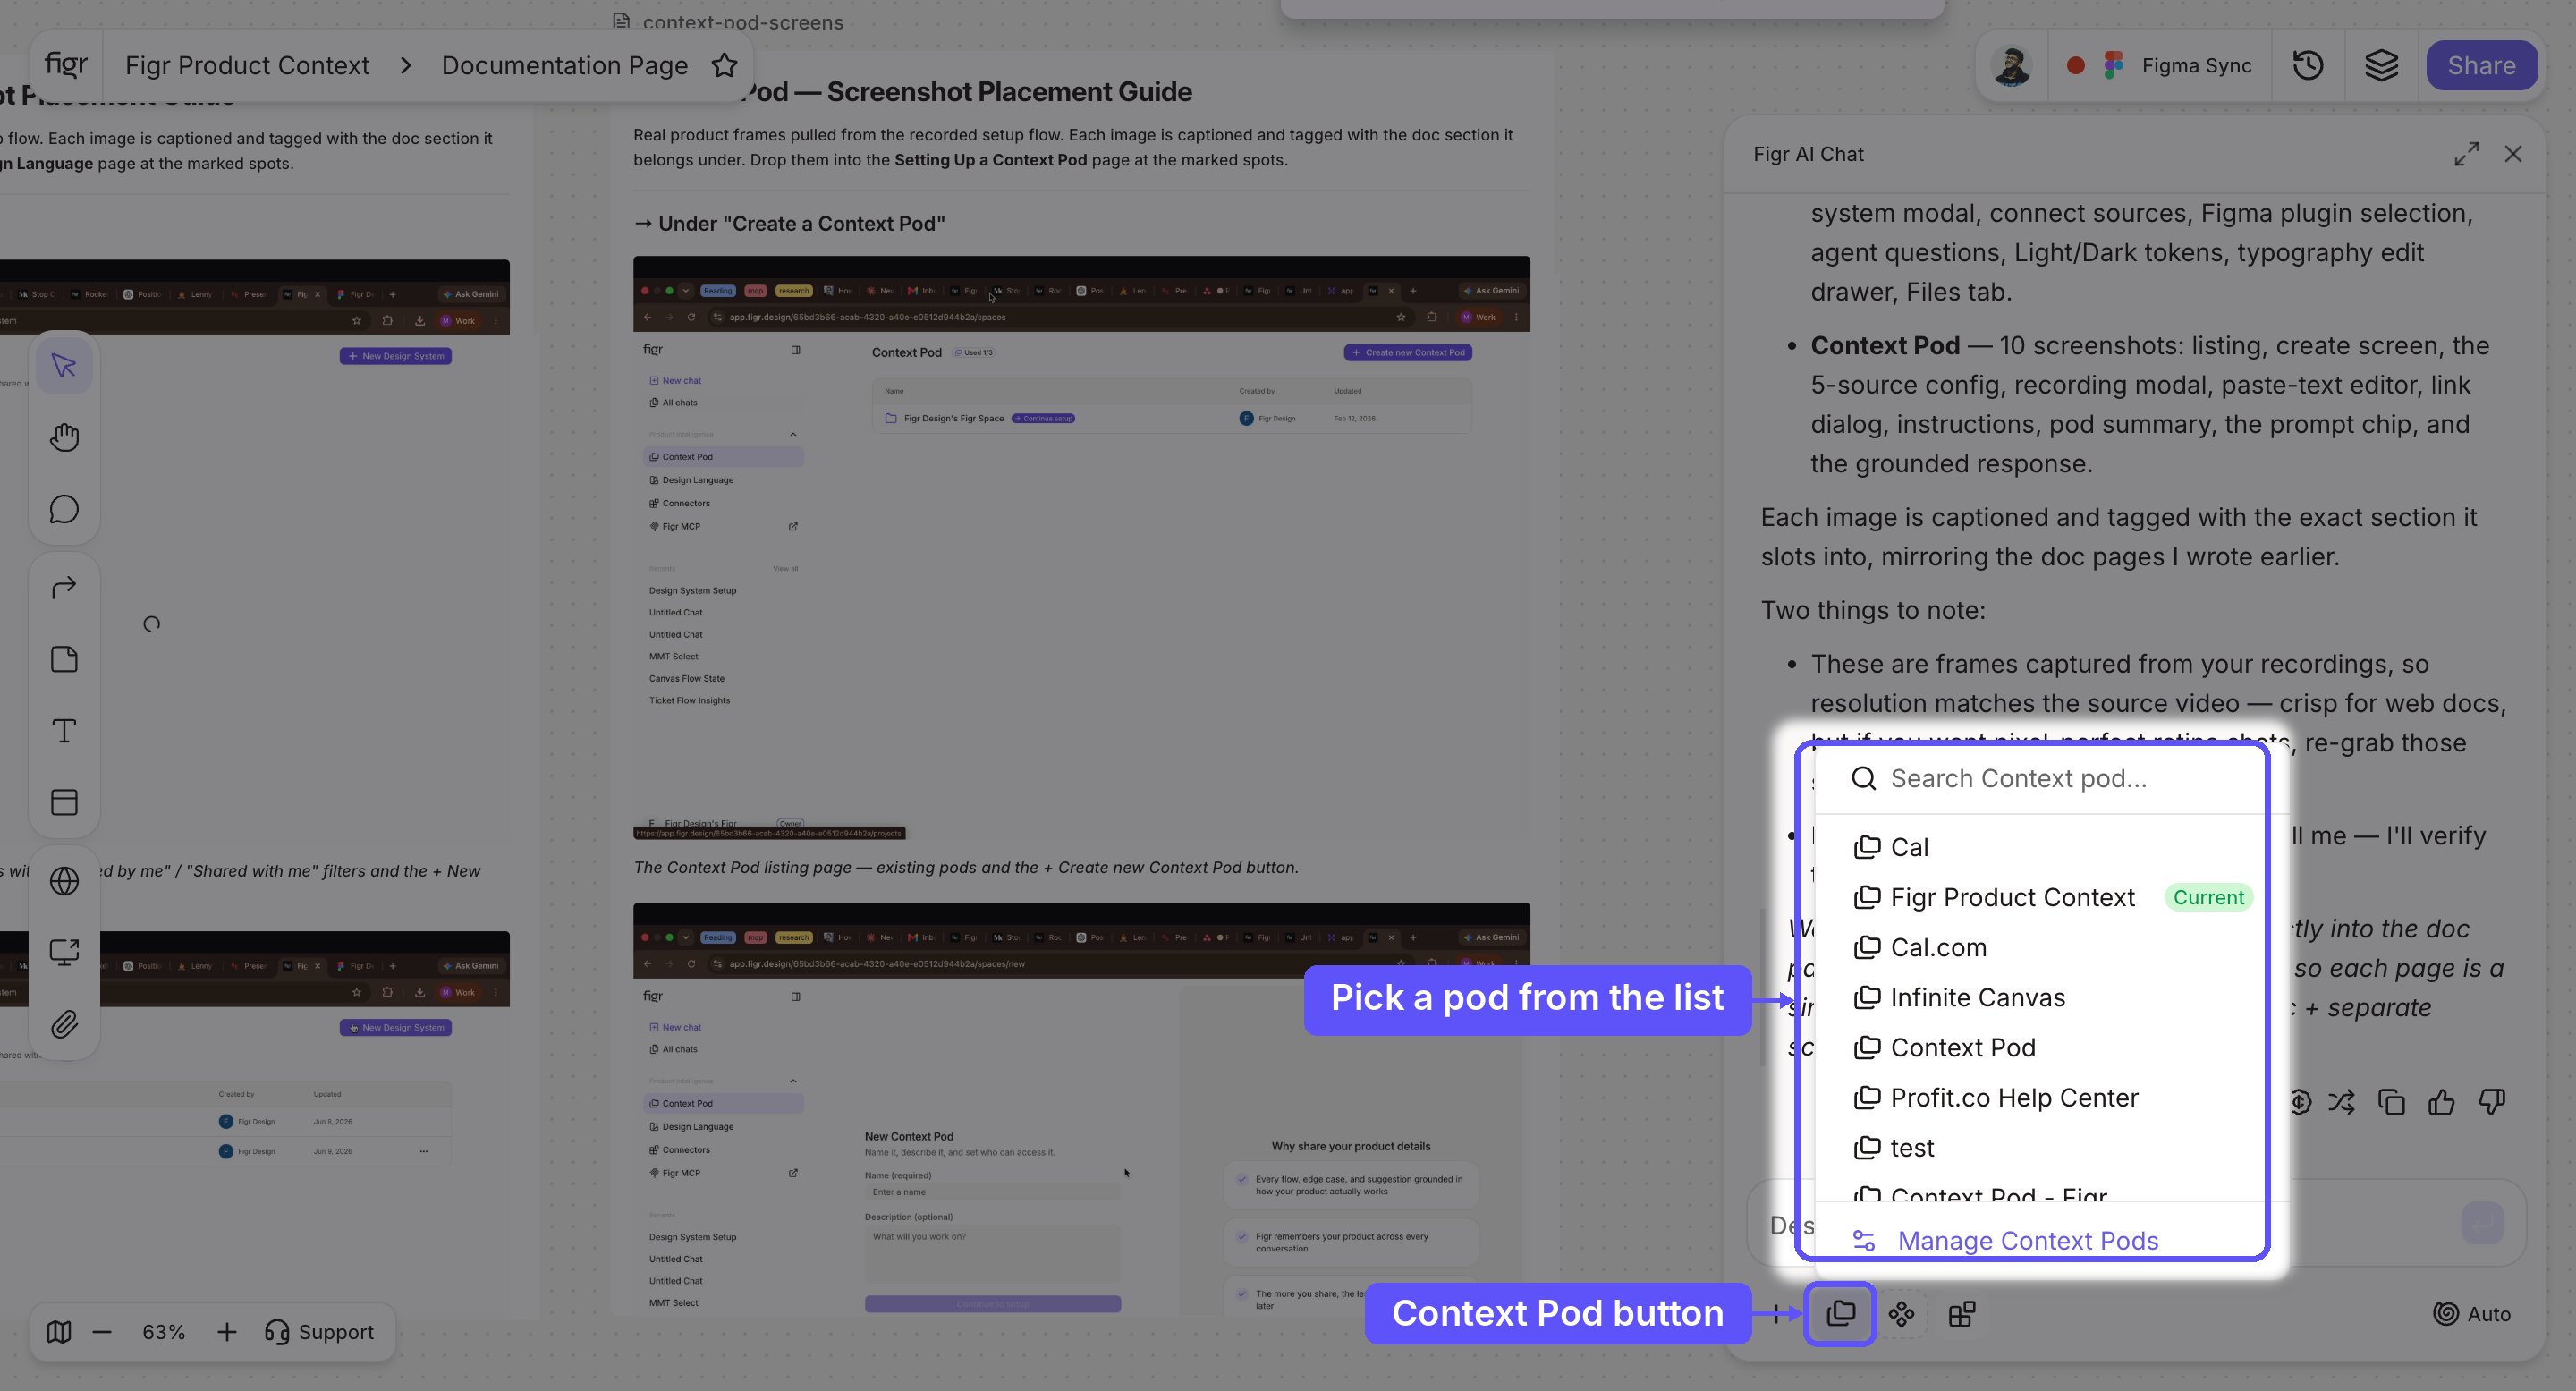
Choose your pod

Pick the pod you want. It appears as an active chip on the prompt.
Context Pod Menu 1
Submit your query and Figr grounds its response in the pod’s sources, referencing your real flows, files, and terminology instead of generic assumptions. Attach the same pod across many projects, so product knowledge follows you everywhere.

Context Pod vs Design Language

The two design-intelligence sources do different jobs, and most teams use both.

Why it matters

Without product context, Figr designs from generic assumptions: plausible screens that do not reflect your actual flows, naming, or user needs, and you re-explain your product in every prompt. With a Context Pod attached, that knowledge is always present. Figr already knows your onboarding flow, your terminology, and your constraints, so it designs for your product, not a generic version of it.

Best practices

  • Lead with a recording. A walkthrough conveys flow and behavior that files alone cannot.
  • Mix source types: a recording for flow, files for detail, instructions for tone.
  • Keep instructions specific. Concrete rules like “use our terms” or “mobile-first” steer output more than vague ones.
  • Reuse across projects. Build one strong pod and attach it everywhere instead of re-uploading per project.
  • Keep it current. Refresh recordings and links when your product changes so context does not drift.

Troubleshooting

Context Pods

What a Context Pod is and how it grounds a project.

Setting up Design Language

Teach Figr how your product should look.

Screen Recordings

Capture a flow to drop into a pod.